I am working on a new application to decode DMR audio on a hotspot and pipe it out the 3.5mm jack on the raspberry pi.
Here is a video of my progress.
I am working on a new application to decode DMR audio on a hotspot and pipe it out the 3.5mm jack on the raspberry pi.
Here is a video of my progress.
I recently setup Hamshack Hotline to link to our 145.33 Allstar node. I ran into a problem with the Allstar node rejecting the connection because of authentication.
Note: If you run into a problem with the connection, run 'asterisk -rvvv' from the command line. You will see messages should the inbound connection fail.
I found this information useful - Asterisk IAX authentication
The instructions from Hamshack Hotline tell you to modify your iax.conf as follows:
[hhphone]
username= HH12345
type=user
context=hhphone
host=dynamic
auth=md5
secret=12345678901234567890
disallow=all
allow=ulaw
allow=g726aal2
allow=gsm
codecpriority=host
transfer=no
callerid=”HamshackHotline”
In my case, authenication failed because the stanza [hhphone] needed to match the value in username. In this example case the username was HH12345. I changed [hhphone] to be [HH12345].
[HH12345]
username= HH12345
type=user
context=hhphone
host=dynamic
auth=md5
secret=12345678901234567890
disallow=all
allow=ulaw
allow=g726aal2
allow=gsm
codecpriority=host
transfer=no
callerid=”HamshackHotline”
This solved the authentication problem.
Here is the setup for Hamshack Hotline using FreePbx. I am assuming that you already have FreePbx setup with a connected phone.
Click on Connectivity and select Trunks.
Click the Add Trunk option. In the drop down select Add IAX2 Trunk.
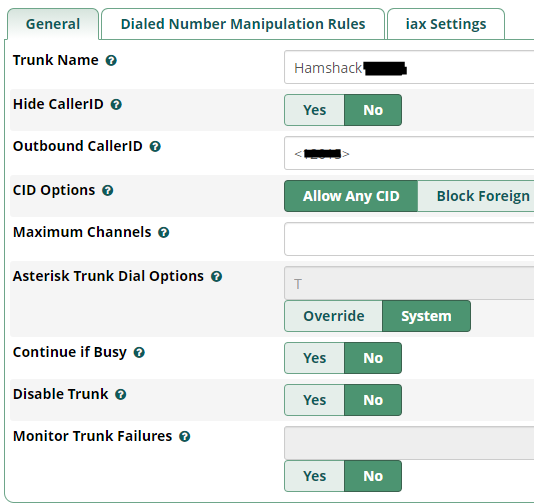
In Trunk Name enter Hamshack#### where #### is your assigned telephone number.
In Outbound Caller Id enter <#####> where ##### is your assigned telephone number. Your screen should look like the following.
host=hhus.wizworks.netusername=#####secret=xxxxxxxxxxxxxxxxxxxxxxxxtype=peerqualify=yes

type=usercontext=from-trunk
Enter your register string as ######:xxxxxxx@hhus.wizworks.net:4569
Replace ##### with your extension number and xxxxx with your assigned secret. This secret is the same on the outgoing and incoming tabs.
Your screen should look like the following.


Your screen should look like the following.

Click on the Dial Patterns tab.
Set the prefix to 7 (you can use any single digit). Enter X. for the match pattern.
Note: Since I have voip service with voip.ms, I am using 7 as a prefix to dial into the Hamshack Hotline server. There are other matching options.
Your screen should look like the following.

I have completed my AllStarLink setup to bridge the 145.33 repeater over to DMR talk group 31018.
